|


Battle of Britain Campaign - Scenario 11
|
On the day before Adlertag, a first attempt was made to blind the RDF system, when German aircraft attacked four radar stations. Operations targeted radar stations at Dunkirk, Dover, Rye and Pevensey. All were damaged and only Dunkirk remained on the air. In the afternoon Ventnor was seriously hit. However all stations were back on the air by the evening except Ventnor. Back in Germany, the day’s raids were assessed as having been very successful. Wildly exaggerated estimates were made of the number of planes destroyed on the ground. A number of the airfields visited that day were duly crossed off as irreparably damaged. However, there was more realism concerning the radar stations. The Head of Signals reported that attacks had not put the radar stations out of action for long.
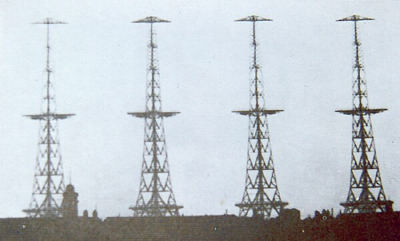
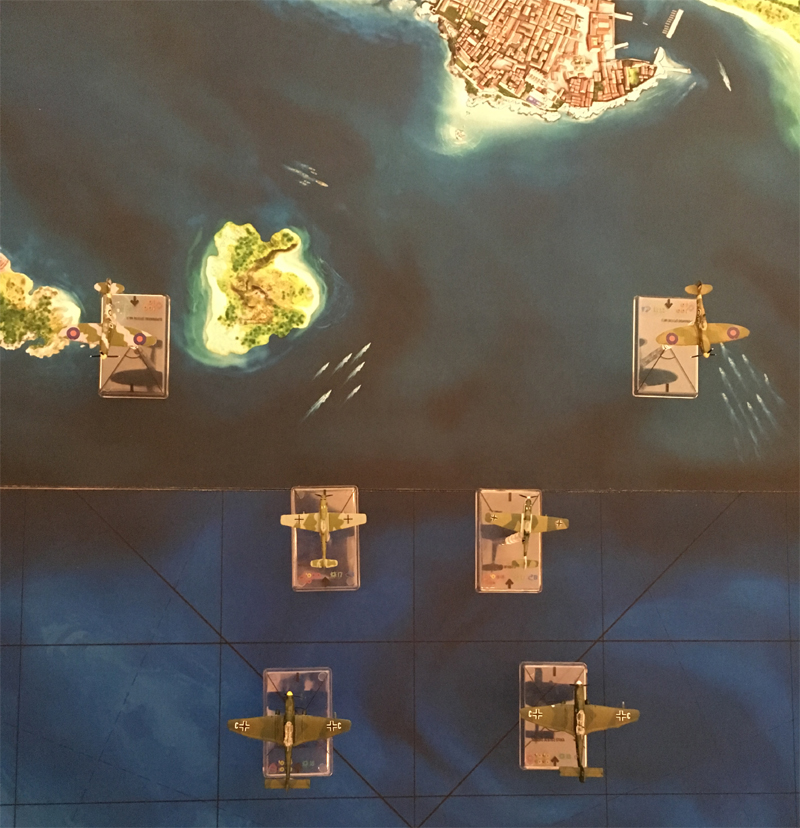
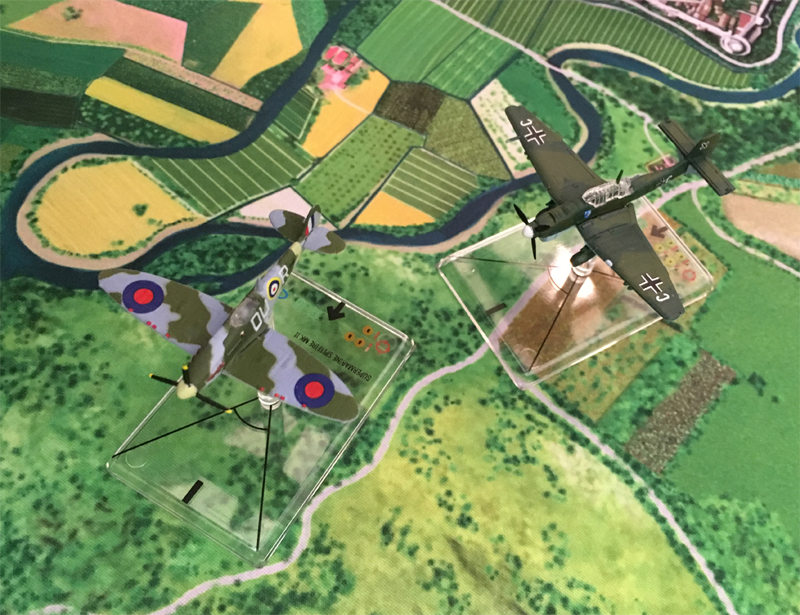
The ActionThe Chief of Luftwaffe Signals, General von Vermouth, had identified the large towers on the coast of Britain as possible targets. These were to be knocked out before the offensive began in earnest. They made tricky targets, so it was decided to destroy them with precision dive-bombing. Oberleutnant Hans von und zu Missendorff was tasked with the mission which he decided to fly together with the newcomer to the squadron Leutnant Didi Schnell. Missendorff was unhappy flying the slow Stukas when opposition from Spitfires could be expected so he asked Oberleutnant Sepp Schlangenaugen and Leutnant Adolf Halland would fly close escort in their Messerschmitt Bf 109 E-4s. Pilot Officers Cholmondeley Featherstonehaugh and Emmett Hollingberry were lounging in deck chairs near their Spitfire Mk IIs when they heard the ready room telephone ring. An incoming raid was detected by RDF and two of 369 Squadron's fighters were to intercept before they reached the coast. The Huns crossed the French coast in tight formation and then the Bf 109s sped ahead of the Stukas in order to deter defending RAF fighters.
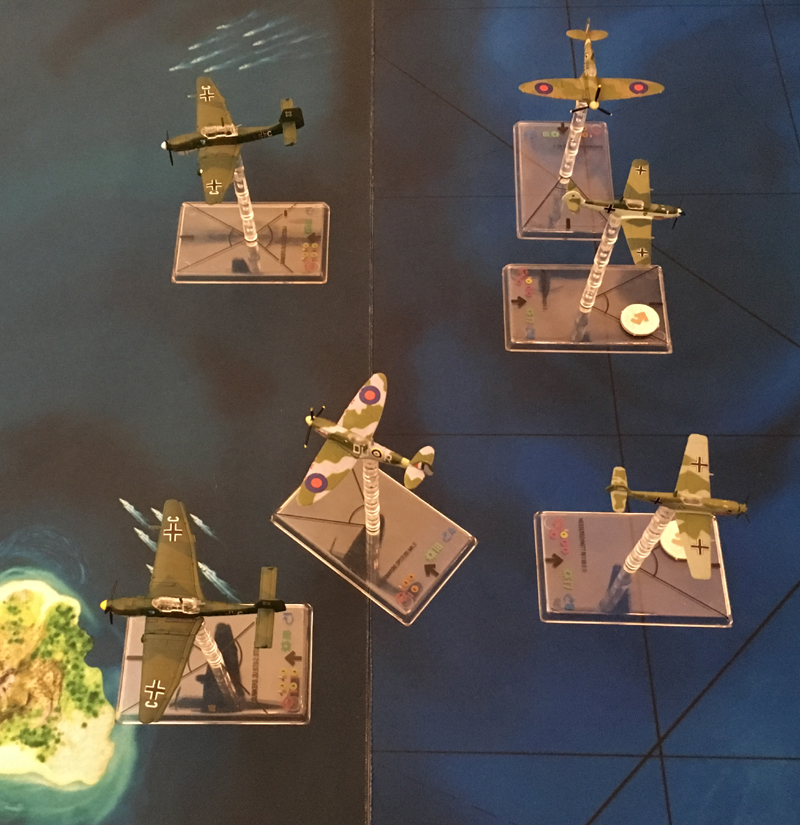
Cholmondeley Featherstonehaugh and Emmett Hollingberry confused the Huns by splitting, in a manoeuvre which could be likened to the formation display teams in their Bulldogs ten years earlier. This trick allowed Featherstonehaugh and Hollingberry a first pass at the Stukas without the 109s interfering. The 109s turned back to rescue the Stukas and started to dogfight with the Spits, but Featherstonehaugh stuck doggedly to the tail of "his" Stuka pouring burst after bust of .303 bullets into the Hun.
This left Hollingberry in an uneven fight with two 109s and he was soon on fire and going down.
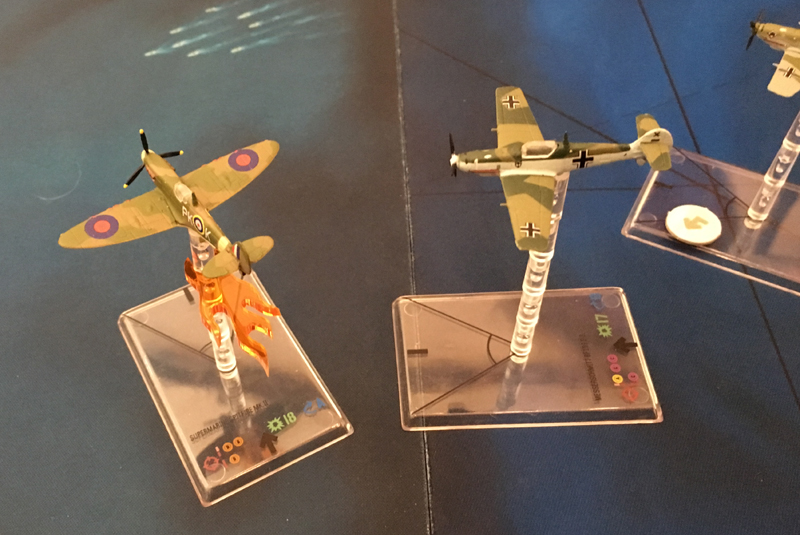
Featherstonehaugh was in trouble, despite emptying all 2,800 of his .303 rounds into the Stuka it seemed to be flying on without problems. Then a lucky shot from Missendorf's rear-gunner caused Featherstonehaugh's engine to start making funny noises and loose power. To add injury to insult, the next burst from the Stuka wounded Featherstonehaugh who decided that discretion really was the better part of valour, at least with this Stuka which seemed unstoppable. The Stukas arrived at the masts and dives so steeply that Featherstonehaugh lost contact. One Stuka as if by magic popped out of the dive just behind Featherstonehaugh and gave him a burst of fire to help him on his way home.
Back home, both Stukas claimed direct hits on the masts, but they were in fact only near misses and the station was still in operation. Featherstonehaugh was patched up by the station doctor and sent on a few days leave to recover. He couldn't drive, so Leading Aircraftman Walker was shanghaied into acting as his driver. As they drove away, his squadron mates could hear Featherstonehaugh's morphine induced ramblings "What-ho the RAF! Bloody 303s! I'll kill that chappy Browning if I get my hands on him! Just not up to snuff! American's can't get anything right! I need bigger! Much bigger! Cannons! Right ho! Explosive! Bang! Bang! Bang ..."
Result
German Victory |
| Next | 
|